v2025-07-10 or later
This manual helps you set up your own design repository that can use RVX.
This method creates a new design repository from scratch and is only available in RVX-cloud.
All results produced using RVX are subject to the following conditions:
They must not be used beyond the predefined purpose and scope specified in advance for a particular class or research project.
They must not be distributed to third parties other than the designated users or organizations.
They are free for non-commercial research use, provided that the paper is cited. All other uses require prior approval and a technology transfer agreement.
Manuals are available online - riscvexpress.github.io
Any part starting with # should be replaced or modified according to your environment.
On Linux, use the bash shell for command-line operations.
On Windows, use the Windows Power Shell for command-line operations.
Create your git repository on a hosting service or a self-managed server.
Names with generic meanings are strictly prohibited, as RVX features are deliberately disabled for repositories with such names.
The following are examples of prohibited names.
rvx_etri, rvx_platform, rvx_alpha, rvx_beta, ...
This list may be updated at any time without prior notice.
Clone your repository onto your local machine.
Clone your repository.
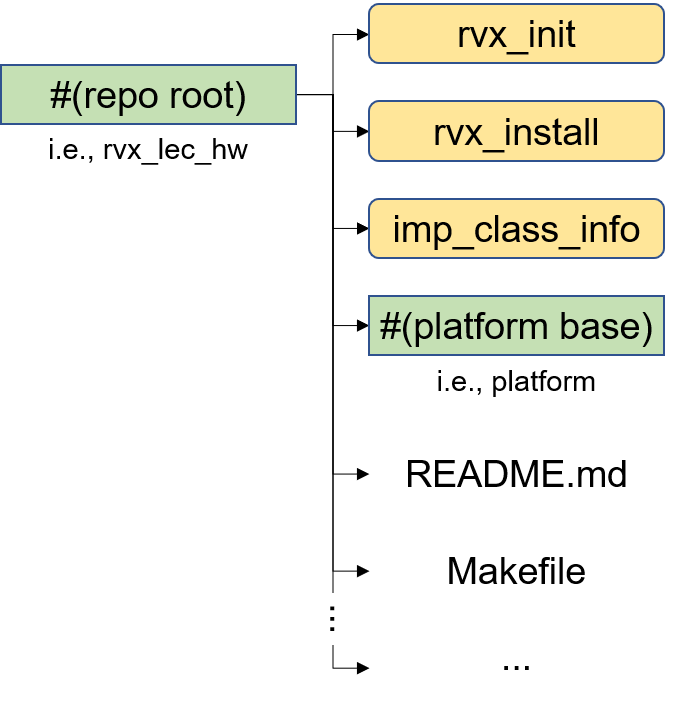
Denote the root directory of the git repository as #(repo root).
Add the following git repositories as submodules under #(repo root).
https://github.com/rvx-etri/rvx_init.git
https://github.com/rvx-etri/rvx_install.git
Copy the contents of #(repo root)/rvx_install/mini_git into #(repo root)
Refer to Figure 1.
For imp_class_info directory,
It contains information about FPGA or SoC boards.
Thus, only the necessary board files need to be copied.
Or, you may create a symbolic link to imp_class_info instead.
Add the copied contents to git.