
v2025-12-06 or later
This manual provides information about the supported FPGA boards and explains how to connect them to your computer for use with RVX.
FPGA prototypes generated by RVX require additional module to connect to your computer, which varies by board.
The additional module is either Olimex ARM-USB-TINY-H (OLIMEX-JTAG) or RVX Expansion Bridge (RVX-EB).
RVX-EB is not an off-the-shelf product and is available by custom order only.
This board is referred to as arty-100t in the RVX
https://digilent.com/shop/arty-a7-100t-artix-7-fpga-development-board/
Vivado freely supports this board.
Vivado 2022.1 or later is required.
Installation of Olimex Driver and Telnet is required (See Miscellaneous section).
Micro-B USB port should be connected to your computer for FPGA programming and UART communication.
PMOD port should be connected to your computer for RVX JTAG communication via the Olimex module (See Miscellaneous section).
Make sure all the sliding switches are set to the down position.
This board is referred to as genesys2 in the RVX
https://digilent.com/reference/programmable-logic/genesys-2/
A valid license for Vivado is required.
A one-year temporary Vivado license is included with the board purchase.
Vivado 2022.1 or later is required.
Installation of Olimex Driver and Telnet is required (See Miscellaneous section).
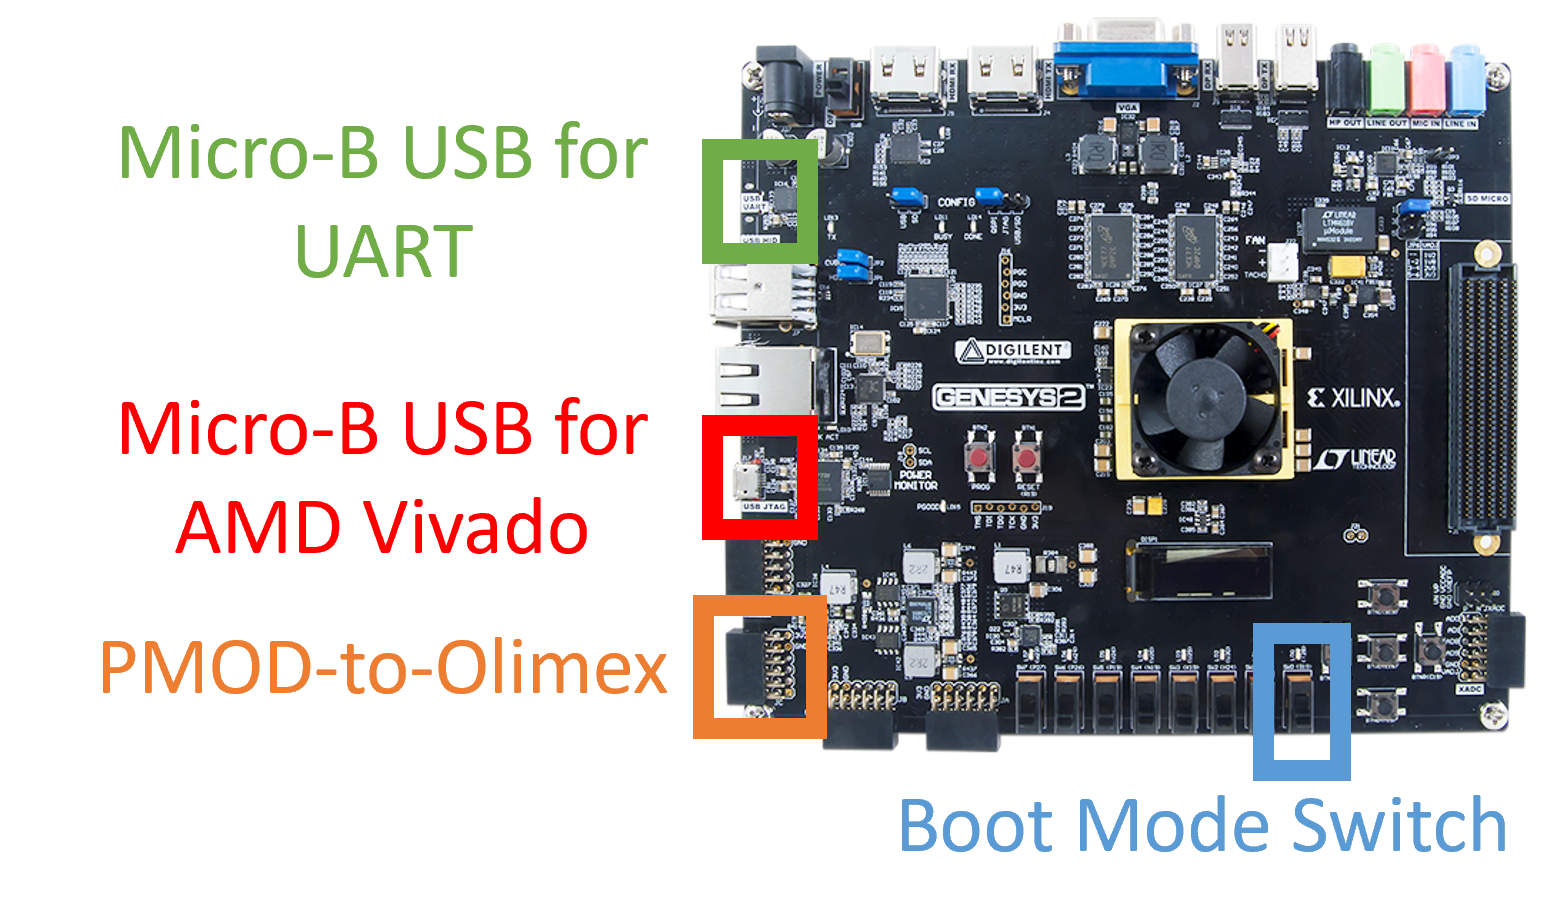
Micro-B USB port should be connected to your computer for FPGA programming.
Another Micro-B USB port should be connected to your computer for UART communication.
PMOD port should be connected to your computer for RVX JTAG communication via the Olimex module (See Miscellaneous section).
Make sure all the sliding switches are set to the down position.
This expanded board is referred to as genesys2-eb in the RVX
https://digilent.com/reference/programmable-logic/genesys-2/
A valid license for Vivado is required.
A one-year temporary Vivado license is included with the board purchase.
Vivado 2022.1 or later is required.
Installation of RVX-EB Driver and Telnet is required (See Miscellaneous section).
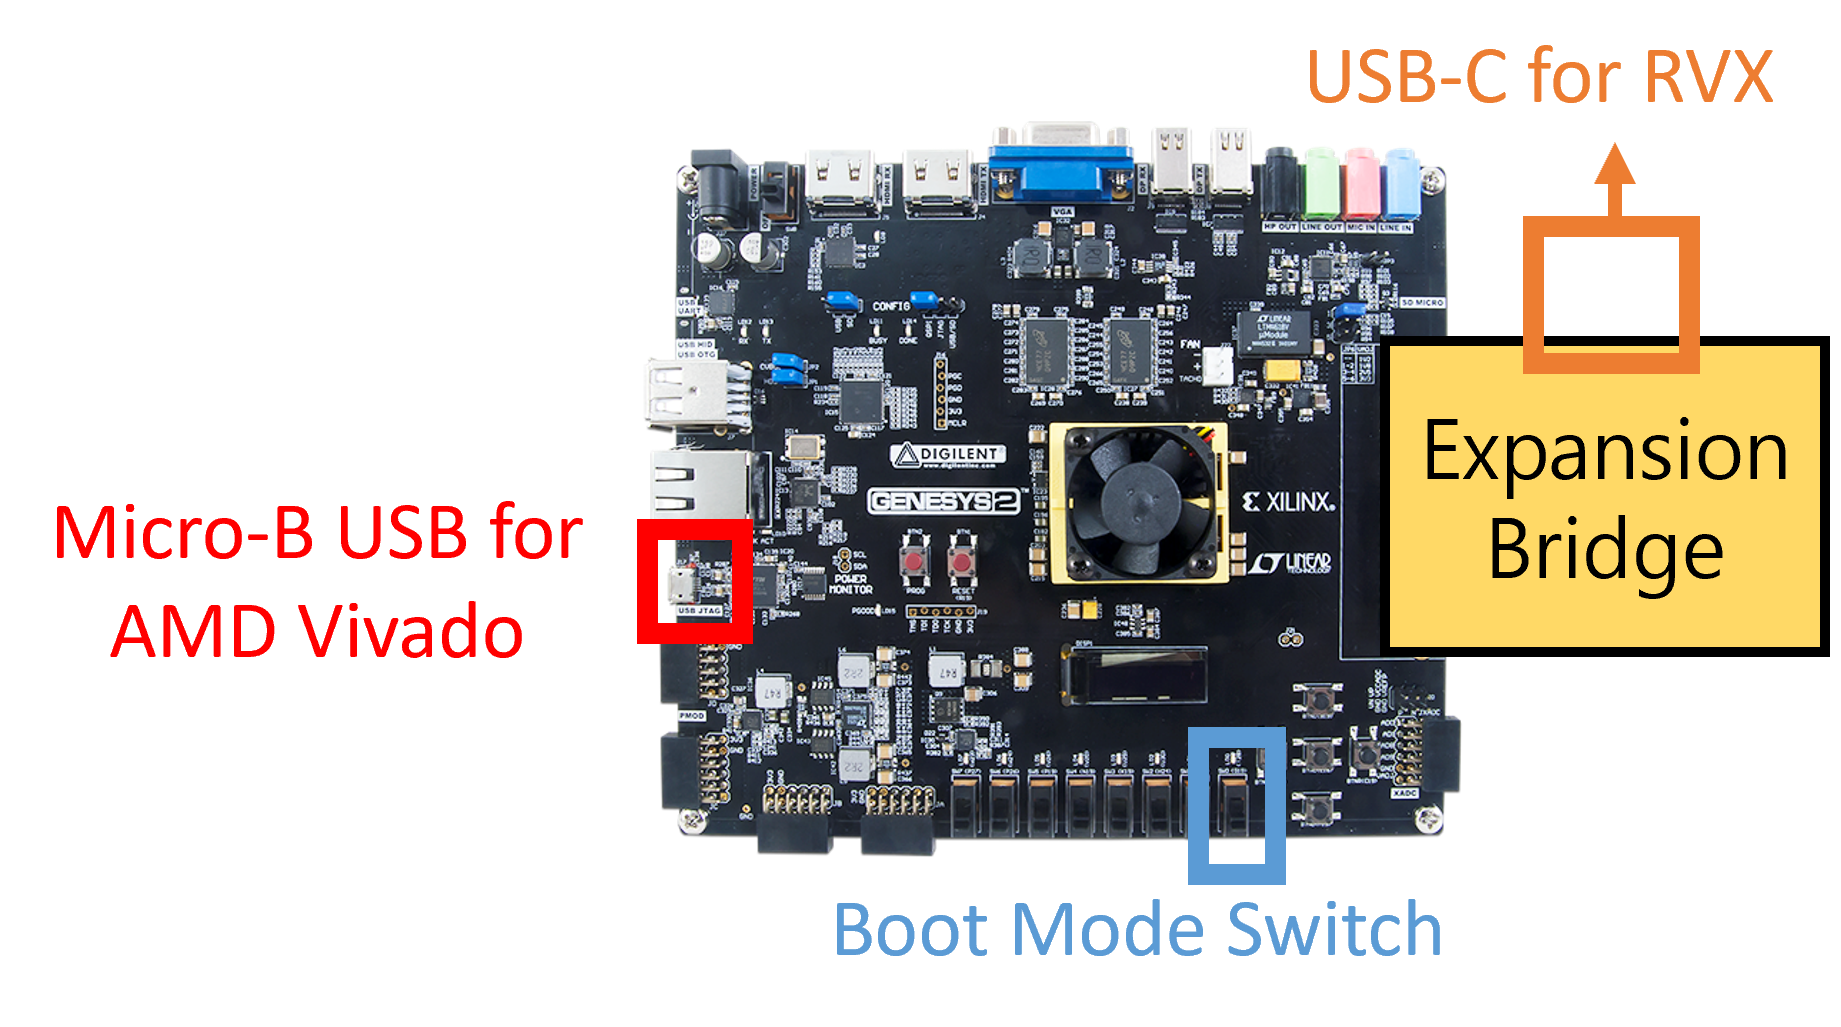
Micro-B USB port should be connected to your computer for FPGA programming.
USB-C port should be connected to your computer for RVX functionality.
Make sure all the sliding switches are set to the down position.
Only AMD boards with an FMC connector are supported.
An FPGA registration process is required (imp_class_info).
The Vivado license depends on the FPGA chip you are using.
Installation of RVX-EB Driver and Telnet is required (See Miscellaneous section).
| Signal | FMC Pin |
|---|---|
| pjtag_rtdo | LA_30P |
| pjtag_rtrstnn | LA_24N |
| pjtag_rtck | LA_30N |
| pjtag_rtdi | LA_28P |
| pjtag_rtms | LA_28N |
| printf_tx | LA_32N |
| printf_rx | LA_32P |
| PMOD1_1 | LA11_N |
| PMOD1_2 | LA11_P |
| PMOD1_3 | LA07_N |
| PMOD1_4 | LA07_P |
| PMOD1_7 | LA04_N |
| PMOD1_8 | LA04_P |
| PMOD1_9 | LA02_N |
| PMOD1_10 | LA02_P |
| PMOD2_1 | LA25_N |
| PMOD2_2 | LA25_P |
| PMOD2_3 | LA22_N |
| PMOD2_4 | LA22_P |
| PMOD2_7 | LA20_N |
| PMOD2_8 | LA20_P |
| PMOD2_9 | LA16_N |
| PMOD2_10 | LA16_P |
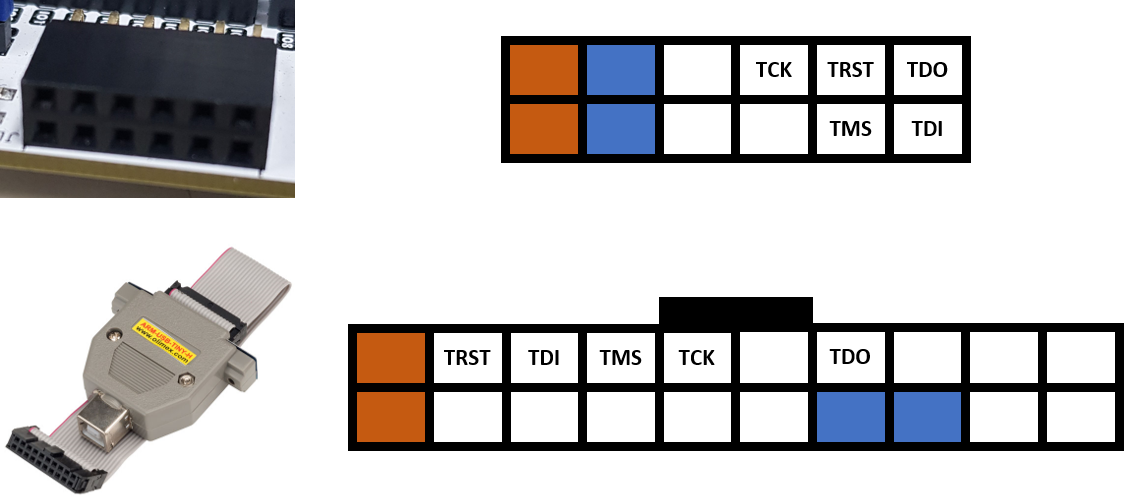
Connect the five labeled signals using wires according to the mapping below.
inst) Connect the OLIMEX-JTAG cable to your computer.
inst) Run the zadig program
> Run ‘zadig-2.5.exe’ from the ${RVX_MINI_HOME}\windows_binary directory.
> Or, Download it from ‘https://zadig.akeo.ie’ and run it.
inst) In the zadig program,
> Select [Olimex OpenOCD JTAG ARM-USB-TINY-H (Interface 0)].
> Click [Install Driver].
> Select [Olimex OpenOCD JTAG ARM-USB-TINY-H (Interface 1)].
> Click [Install Driver].No additional installation is required.
inst) Connect the RVX-EB cable to your computer.
inst) Run the zadig program
> Run ‘zadig-2.5.exe’ from the ${RVX_MINI_HOME}\windows_binary directory.
> Or, Download it from ‘https://zadig.akeo.ie’ and run it.
inst) In the zadig program,
> Click [Options] in the menu bar.
> Click [List All Devices] by enable it.
> Select [Quad RS232-HS (Interface 0)].
> Select [WinUSB (XXXXXX)].
> Click [Install Driver] or [Replace Driver].No additional installation is required.
inst) Open [Control Panel]
> e.g., type ‘control’ into the Windows Search bar.
inst) Click [Programs]
inst) Click [Turn Windows features on or off]
inst) Enable [Telnet Client]
inst) ConfirmNo additional installation is required.
If you use only Telnet on Windows without installing Vivado,
you need to install the FTDI driver.
Install the VCP drivers from https://ftdichip.com/drivers.
No additional installation is required.